Showing posts with label pears. Show all posts

Pear and Hazelnut Tart and More Holiday Baking


    I know sometimes I must sound like a broken record repeating over and over again how much I love this time of year. I really do. I believe this is a consequence of a childhood where the days leading up to Christmas were always full of excitement. The pastry shop shelves full of beautifully packaged marzipan figures, special orders being placed and a sea of people coming and going. The back of the house was the gathering place for many. My grandparents were loved and their doors were always open.


    Even though my life here is much quieter, I still love to entertain. It just wouldn't be the same without small dinners with the people I love.


    This is a pear and hazelnut frangipane tart I made for one of those dinners a few days ago. Great with salted caramel ice cream, over tea and good conversation.


    There are also the smaller version of the tarts, crustless. Pears and frangipane baked in baking cups and topped with pie dough cutouts, which make a great packaged gift.


    Now, what some of you have been waiting for... The winner of the Pip Studio giveaway is Whisk the Pantry.


    Thank you everyone for taking part and for your generous comments. Always fun.


    Pear and Hazelnut Frangipane Tart


    makes enough for a 9" tart mold


    Gluten Free Pie Dough


    1 cup (140 grams) superfine brown rice flour

    2 Tbs (20 grams) potato starch

    2 Tbs (20 grams) tapioca starch

    1/4 tsp xanthan gum

    1/4 tsp salt

    1/2 cup (115 grams) unsalted butter, cold and diced

    3 to 4 Tbs (45 to 60 ml) ice cold water


    Place the first five ingredients in the food processor and pulse a couple of times to combine. Add the cold, diced butter and pulse 10 times until the butter is cut into the flours. Add the ice water while pulsing. You might not need all of it so reserve a couple of Tbs until mixed. The dough should stick together when pressed but not be too wet.


    Form the dough into a disk, wrap it in plastic wrap and flatten it a bit with your hand. Refrigerate the dough for about 1 hour.


    Roll out the dough to about 1/4"-1/8" thickness and fill the tart mold with it. If the dough cracks, don't worry, just pinch it back together. It might happen if it's too cold. Return the tart mold to the refrigerator for another 20 minutes or so while preparing the filling.


    Roll the leftover scraps and cut shapes with star cookie cutters. Place on a baking sheet lined with parchment and bake at 375F for about 8 minutes. Reserve.


    Pear and Hazelnut Frangipane Filling


    1/2 cup (115 grams) unsalted butter, room temperature

    1/2 cup (110 grams) cane sugar

    1 egg

    1 cup (110 grams) hazelnut flour

    1 Tbs (10 grams) tapioca starch

    pinch of salt

    1 Tbs dark rum, optional

    7 forelle pears, halved and core removed


    Cream the butter and the sugar together until light. Add the egg and mix. Add the rest of the ingredients and mix until combined.


    Spread the frangipane inside the tart mold. Cut the pears and place them on top of the frangipane.


    Bake in the middle of the oven at 350F for about 30-40 minutes until filling brown and the bottom of the tart cooked. Decorate with star cookies and powdered sugar.

Post Title

→

Pear and Hazelnut Tart and More Holiday Baking


Post URL

→

https://mercymadame.blogspot.com/2010/12/pear-and-hazelnut-tart-and-more-holiday.html


Visit Merci Madame for Daily Updated Wedding Dresses Collection
Pear, Apple and Fennel Salad and More Holiday Cookies


    It's hard to believe Thanksgiving came and went in a blink of an eye. 'What comes next?", asked J. who can only tell time by the order in which holidays are approaching. I really wanted to tell him to enjoy the moment, to savor every second he has because time will fly soon enough. But again, I remember my own anxiety with time when I was a child. Soon was never soon enough.


    We cooked, we ate and we enjoyed each others company this weekend. Thanksgiving morning we took the kids to the park. It was a beautiful morning and the streets were deserted. We had the park all to ourselves. "Let's really enjoy dinner" I told C.

    It is easy for me to feel rushed at the dinner table with small children, especially when is just us. Just us might make it seem less important sometimes, but I was determined to sit down, enjoy and have a long conversation with my family, just like we used to do growing up. And so we did and it is the special moment I took away with me this weekend.


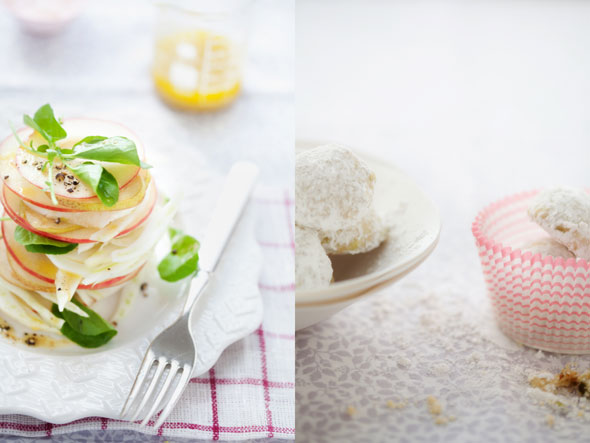
    I spent Saturday morning baking cupcakes and more holiday cookies. C. asked to make his favorite pistachio sandies. Crumbly and soft, covered in melting powdered sugar. One of my all time favorites as well. I took some cupcakes to my friend Lena's house in exchange of some fresh greens from her garden.

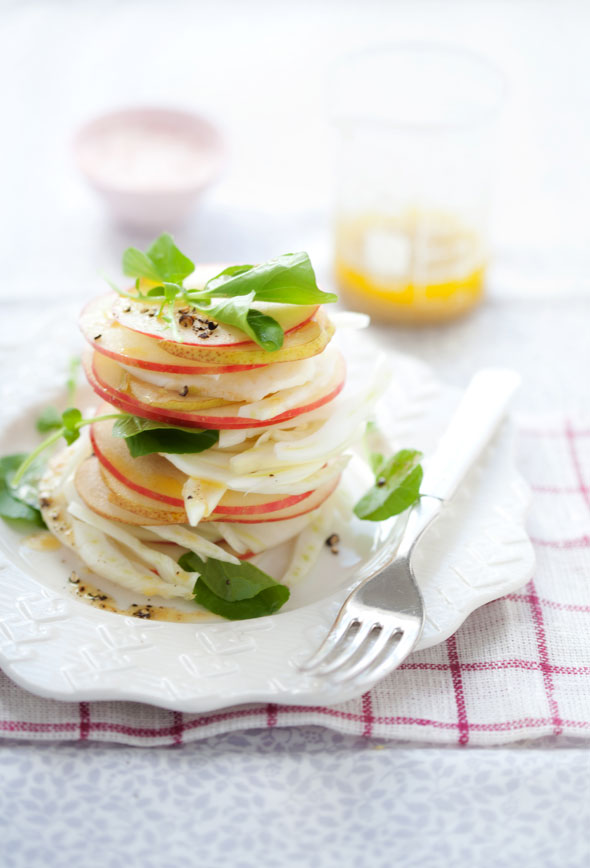
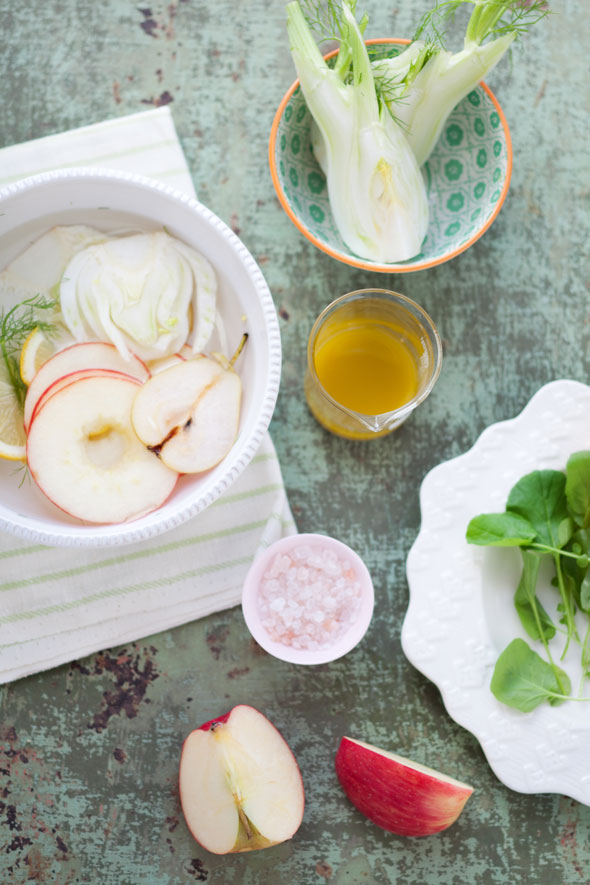
    Lunch was simple. I craved simple after all the heavy cooking and eating of the previous days. Thinly sliced apples, forelle pears and fennel with a simple apple cider vinaigrette inspired by Donna Hay's towering salads.


    And so let the holiday baking continue...

    Pear, Apple and Fennel Salad

    makes 4 servings

    2 honeycrisp apples, thinly sliced
    4 forelle pears, thinly sliced
    2 fennel bulbs, cored and thinly sliced
    1 cup fresh watercress
    1 tsp dijon mustard
    1 lemon, juiced
    1 Tbs apple cider vinegar
    1/4 cup olive oil
    1/2 tsp salt
    1/2 tsp freshly ground pepper


    In a large bowl, combine water and the juice of 1 lemon. Thinly slice the apples, per and fennel and place the slices in the water immediately after to avoid oxidation. To make the vinaigrette, whisk together the mustard, apple cider vinegar and olive oil. Stack the sliced vegetables and garnish with watercress leaves. Season with salt and pepper and drizzle the vinaigrette on top.


    Pistachio Sandies

    makes 2 dozen 1" ball cookies

    4 oz (115 grams) unsalted butter, room temperature
    1/3 cup (45 grams) powdered sugar
    1/2 tsp vanilla extract
    3/4 cup (110 grams) superfine brown rice flour
    2 Tbs (20 grams) tapioca starch
    1/4 cup (40 grams) pistachios, chopped
    pinch of salt
    powdered sugar, for rolling


    Cream the butter and powdered sugar together for a minute or so. Add the vanilla extract. Add the flour, tapioca starch, salt and chopped pistachios. Mix until the dough comes together.

    using a 1" ice cream scoop, scopp out the dough forming little balls. Place them on a baking sheet lined with parchment paper about 1" apart.

    Bake at 350F for about 15-18 minutes until bottom lightly golden and when touched, they don't fall apart. Let them cool in the pan for about 5 minutes. Roll them in powdered sugar while still warm.

Post Title

→

Pear, Apple and Fennel Salad and More Holiday Cookies


Post URL

→

https://mercymadame.blogspot.com/2010/11/pear-apple-and-fennel-salad-and-more.html


Visit Merci Madame for Daily Updated Wedding Dresses Collection
The Smells of Pears, Hazelnuts, Brown Butter and Vanilla Bean


    It was some time last week. Early morning. I woke up and headed outside to water my plants when suddenly, I realized... autumn had arrived. It was sunny, yet cool and brisk, just like those perfect Florida winter days. I opened all the windows for the first time in weeks. The best feeling in the world.


    It took me a few days to really come down from the high of BlogHer Food and I have really been lying low.

    San Francisco was wonderful. I really didn't have much of a chance to socialize as I had M. with me and late night parties were just not going on the agenda for us this time. But it was great to spend time with dear friends (old and new), eat some fantastic chilaquiles and sing lots of monkey songs with this little girl.


    And so this week, with the cool breeze coming in, I wanted to fill the house with smells of autumn. Sweet, toasty and nutty smells of brown butter, toasted hazelnuts, cinnamon sugar coated cakes... All those wonderful smells I'm sure you know too.


    First, pears and raspberries with a hazelnut and oat crumble topping, because it's one of the easiest desserts to make.

    And then, pear, hazelnut and brown butter cakes. In fact, I'm just enjoying the last one of the cakes while I type this.

    Can you smell them yet?


    Oh and one more wonderful act of kindness... A few weeks ago, I stumbled upon this blog by prop stylist Paula Walters. We started talking, one thing led to another and the next thing I know, there are some wonderful vintage cooling racks in the mail for me. Awesomeness. Thank you Paula!

    Pear, Hazelnut and Brown Butter Cakes

    makes a dozen mini bundtcakes

    1 cup (125 grams) superfine brown rice flour
    1/2 cup (50 grams) hazelnut flour
    2 Tbs (20 grams) tapioca starch
    1/8 tsp xanthan gum
    1 1/2 tsp baking powder
    1/4 tsp salt
    1/2 tsp cinnamon
    10 Tbs (140 grams) unsalted butter, browned
    1/3 cup (85 grams) brown sugar
    1/3 cup (100 grams) maple syrup
    1 vanilla bean, split and seeded
    2 eggs
    2 pears, grated
    1 cup (200 grams) superfine sugar
    1 tsp cinnamon


    Place the butter in a small saucepan and cook it until the milk solids start to turn brown on the bottom of the pan and smells nutty. Strain it and let it cool slightly.

    In a large bowl, whisk together the first seven ingredients. In a separate bowl, whisk together the brown sugar, maple syrup, eggs and vanilla bean. Add the cooled brown butter and whisk. Add the liquids to the dry ingredients and whisk until incorporated. Fold in the grated pears.

    Divide the batter in the mini bundt pan mold. Bake at 350F for about 20 minutes.

    Let them cool for a couple of minutes in the pan. Remove the cakes from the pan and toss them in the cinnamon sugar.

Post Title

→

The Smells of Pears, Hazelnuts, Brown Butter and Vanilla Bean


Post URL

→

https://mercymadame.blogspot.com/2010/10/smells-of-pears-hazelnuts-brown-butter.html


Visit Merci Madame for Daily Updated Wedding Dresses Collection
Maple and Homemade Yogurt Panna Cotta with Poached Forelle Pears


    I cannot believe that I am actually writing this post in between was seems to be early labor. Contractions have been happening on and off for the last few hours and when I visited my midwife this morning, she said this baby is well on her way. I never thought I would be blogging or tweeting through this (so unlike me), but the excitement is way stronger than I anticipated. I believe nature is wise and that my body was actually waiting for my parents to arrive to really get things going.


    I made this panna cotta a couple of days before my parents actually arrived, but I knew I had to freeze some for them to taste. Poached fruit is one of my mom's favorite desserts and I have fortunately inherited that from her. So simple and light.

    It had been a while since I made homemade yogurt, but for some reason, I have been at it again lately. I've been using yogurt in almost everything and I love the touch of acidity that it adds to the panna cotta. It's a beautiful contrast to the sweet and dark maple syrup.


    So this is it for now. Short and sweet. Like I said before, now we just have to let life happen. I will be back shortly with news, more recipes and photos to share. Thank you very much!


    Poached Forelle Pears

    300 grams sugar
    600 grams water
    2 vanilla beans, split
    1 cinnamon stick
    1 Tbs fresh ginger
    8 forelle pears, peeled


    Place all ingredients in a medium saucepan and bring to a boil until sugar dissolves. Turn heat to low and poach the pears (they may not al fit at once) until tender, about 15 minutes.

    Maple and Homemade Yogurt Panna Cotta

    500 ml heavy cream
    150 grams dark maple syrup
    4 sheets of gelatin
    250 ml homemade yogurt


    Place the heavy cream and maple syrup in a small saucepan and bring to a light boil. In the meantime, soak the gelatin sheets in ice water until soft, about 5 minutes. Squeeze out the excess water from the gelatin and add it to the hot cream. Stir to dissolve.

    Transfer the cream to a clean bowl and let it cool to body temperature. Add the yogurt and stir. Pour into containers and refrigerate until set.

    Serve with the poached pears, maple syrup and some chopped pistachios.

Post Title

→

Maple and Homemade Yogurt Panna Cotta with Poached Forelle Pears


Post URL

→

https://mercymadame.blogspot.com/2009/11/maple-and-homemade-yogurt-panna-cotta.html


Visit Merci Madame for Daily Updated Wedding Dresses Collection
Forelle Pears


    My friends know me well.

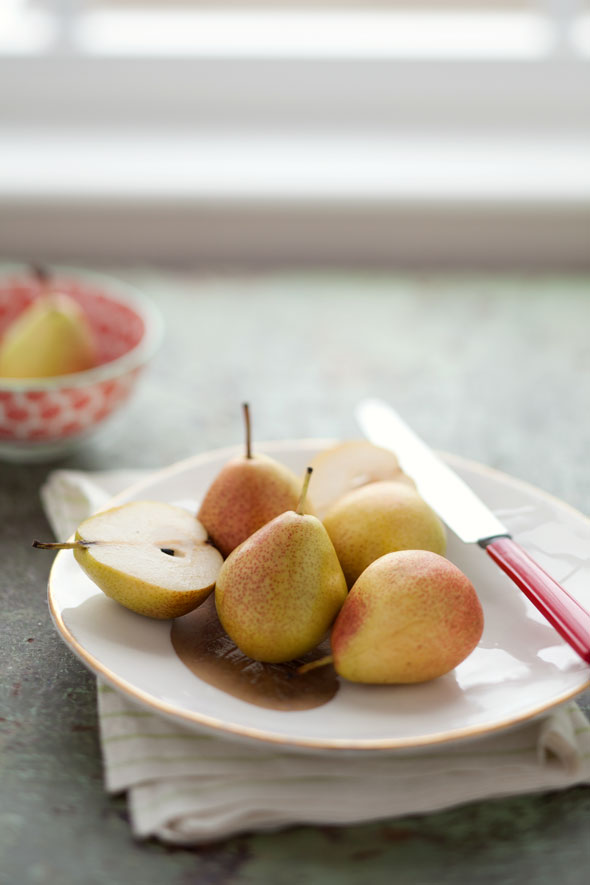
    I received these as a gift a couple of days ago and today I poached them in a spice sugar syrup and served them with maple syrup and homemade yogurt panna cotta. It really put me in the holiday mood as I realized there are only two weeks left before Thanksgiving.

    I am getting the house ready for my parents to arrive this weekend and then just waiting for life to happen. And thank you everyone for your emails and comments with all your well wishes!

    Will be back with the recipe and photos soon!

Post Title

→

Forelle Pears


Post URL

→

https://mercymadame.blogspot.com/2009/11/forelle-pears.html


Visit Merci Madame for Daily Updated Wedding Dresses Collection

Mini Pear, Raspberry and Ginger Pies for Project Wedding


    I have been loving the very rustic, natural and country-style weddings that I have been reading about lately. Like this one, this one or this one. I think that when the world feels a little chaotic, we tend to resort to a homemade kind of lifestyle with lots of home cooking, personalized gifts and DIY touches. So for this month's Project Wedding assignment, I created individual pear, raspberry and ginger pies with a rustic touch that can be served at any wedding instead of the traditional cake and are so simple to make.


    Fall made it's first appearance in South Florida today and it has put me in the mood for lots of comfort food, apples, quince and falling leaves, so I think it's going to be that kind of weekend for us.

    For more photos and the recipes, please go here. Hope you like it!

Post Title

→

Mini Pear, Raspberry and Ginger Pies for Project Wedding


Post URL

→

https://mercymadame.blogspot.com/2009/09/mini-pear-raspberry-and-ginger-pies-for.html


Visit Merci Madame for Daily Updated Wedding Dresses Collection

Daring Bakers, Brunch and Some More Pate Feuilletee


    When I learned that for this month's Daring Bakers challenge we would be making puff pastry and vol-au-vents, I smiled. As I have said it before, I love laminated doughs and have tried my share of puff pastry recipes in this blog. Chocolate, inverted, tomato, raspberry... so this was the perfect excuse to try a new recipe.


    Vol-au-vents remind me of home and they remind me of pintxo bars. I remember as a kid going out for pintxos with my uncles and aunts every Sunday morning. It was and still is a ritual for many people, pintxo bar hopping. From one good one to the next.

    Vol-au-vents are the perfect vessel for small bites such as egg scrambles, sauteed wild mushrooms, seafood salads, chorizo... You name it and a vol-au-vent will hold it. So when presented with this month's challenge, I immediately thought of making a very typical Basque appetizer that we had for brunch Saturday morning. An egg scramble with sauteed oyster mushrooms, green asparagus, garlic, goat cheese, purple basil, parsley and a bit of pink peppercorn. Super simple but loaded with flavor.

    With the leftover puff pastry dough, I made thin pear and pistachio frangipane galettes that we also had for brunch. I can never have enough puff pastry.


    As for this puff pastry recipe, it is very easy to roll, quick and very forgiving. However, I have to admit that I find that even though Pierre Herme's inverted puff pastry recipe is harder to work with at first, it yields a flakier product in the end. That's just my preference though and this was a great recipe that I will definitely try again.


    The September 2009 Daring Bakers' challenge was hosted by Steph of A Whisk and a Spoon. She chose the French treat, Vols-au-Vent based on the Puff Pastry recipe by Michel Richard from the cookbook Baking With Julia by Dorie Greenspan.

    Michel Richard’s Puff Pastry Dough

    From: Baking with Julia by Dorie Greenspan
    Yield: 2-1/2 pounds dough

    Ingredients:
    2-1/2 cups (12.2 oz/ 354 g) unbleached all-purpose flour
    1-1/4 cups (5.0 oz/ 142 g) cake flour
    1 tbsp. salt (you can cut this by half for a less salty dough or for sweet preparations)
    1-1/4 cups (10 fl oz/ 300 ml) ice water
    1 pound (16 oz/ 454 g) very cold unsalted butter

    plus extra flour for dusting work surface


    Mixing the Dough:

    Check the capacity of your food processor before you start. If it cannot hold the full quantity of ingredients, make the dough into two batches and combine them.

    Put the all-purpose flour, cake flour, and salt in the work bowl of a food processor fitted with a metal blade and pulse a couple of times just to mix. Add the water all at once, pulsing until the dough forms a ball on the blade. The dough will be very moist and pliable and will hold together when squeezed between your fingers. (Actually, it will feel like Play-Doh.)

    Remove the dough from the machine, form it into a ball, with a small sharp knife, slash the top in a tic-tac-toe pattern. Wrap the dough in a damp towel and refrigerate for about 5 minutes.

    Meanwhile, place the butter between 2 sheets of plastic wrap and beat it with a rolling pin until it flattens into a square that's about 1" thick. Take care that the butter remains cool and firm: if it has softened or become oily, chill it before continuing.

    Incorporating the Butter:

    Unwrap the dough and place it on a work surface dusted with all-purpose flour (A cool piece of marble is the ideal surface for puff pastry) with your rolling pin (preferably a French rolling pin without handles), press on the dough to flatten it and then roll it into a 10" square. Keep the top and bottom of the dough well floured to prevent sticking and lift the dough and move it around frequently. Starting from the center of the square, roll out over each corner to create a thick center pad with "ears," or flaps.

    Place the cold butter in the middle of the dough and fold the ears over the butter, stretching them as needed so that they overlap slightly and encase the butter completely. (If you have to stretch the dough, stretch it from all over; don't just pull the ends) you should now have a package that is 8" square.

    To make great puff pastry, it is important to keep the dough cold at all times. There are specified times for chilling the dough, but if your room is warm, or you work slowly, or you find that for no particular reason the butter starts to ooze out of the pastry, cover the dough with plastic wrap and refrigerate it . You can stop at any point in the process and continue at your convenience or when the dough is properly chilled.

    Making the Turns:

    Gently but firmly press the rolling pin against the top and bottom edges of the square (this will help keep it square). Then, keeping the work surface and the top of the dough well floured to prevent sticking, roll the dough into a rectangle that is three times as long as the square you started with, about 24" (don't worry about the width of the rectangle: if you get the 24", everything else will work itself out.) With this first roll, it is particularly important that the butter be rolled evenly along the length and width of the rectangle; check when you start rolling that the butter is moving along well, and roll a bit harder or more evenly, if necessary, to get a smooth, even dough-butter sandwich (use your arm-strength!).

    With a pastry brush, brush off the excess flour from the top of the dough, and fold the rectangle up from the bottom and down from the top in thirds, like a business letter, brushing off the excess flour. You have completed one turn.

    Rotate the dough so that the closed fold is to your left, like the spine of a book. Repeat the rolling and folding process, rolling the dough to a length of 24" and then folding it in thirds. This is the second turn.

    Chilling the Dough:

    If the dough is still cool and no butter is oozing out, you can give the dough another two turns now. If the condition of the dough is iffy, wrap it in plastic wrap and refrigerate it for at least 30 minutes. Each time you refrigerate the dough, mark the number of turns you've completed by indenting the dough with your fingertips. It is best to refrigerate the dough for 30 to 60 minutes between each set of two turns.

    The total number of turns needed is six. If you prefer, you can give the dough just four turns now, chill it overnight, and do the last two turns the next day. Puff pastry is extremely flexible in this regard. However, no matter how you arrange your schedule, you should plan to chill the dough for at least an hour before cutting or shaping it.

    Forming and Baking the Vols-au-Vent

    Using a knife or metal bench scraper, divided your chilled puff pastry dough into three equal pieces. Work with one piece of the dough, and leave the rest wrapped and chilled. (If you are looking to make more vols-au-vent than the yield stated above, you can roll and cut the remaining two pieces of dough as well…if not, then leave refrigerated for the time being or prepare it for longer-term freezer storage. See the “Tips” section below for more storage info.)

    On a lightly floured surface, roll the piece of dough into a rectangle about 1/8 to 1/4-inch (3-6 mm) thick. Transfer it to the baking sheet and refrigerate for about 10 minutes before proceeding with the cutting.

    (This assumes you will be using round cutters, but if you do not have them, it is possible to cut square vols-au-vents using a sharp chef’s knife.) For smaller, hors d'oeuvre sized vols-au-vent, use a 1.5” round cutter to cut out 8-10 circles. For larger sized vols-au-vent, fit for a main course or dessert, use a 4” cutter to cut out about 4 circles. Make clean, sharp cuts and try not to twist your cutters back and forth or drag your knife through the dough. Half of these rounds will be for the bases, and the other half will be for the sides. (Save any scrap by stacking—not wadding up—the pieces…they can be re-rolled and used if you need extra dough. If you do need to re-roll scrap to get enough disks, be sure to use any rounds cut from it for the bases, not the ring-shaped sides.)

    Using a ¾-inch cutter for small vols-au-vent, or a 2- to 2.5-inch round cutter for large, cut centers from half of the rounds to make rings. These rings will become the sides of the vols-au-vent, while the solid disks will be the bottoms. You can either save the center cut-outs to bake off as little “caps” for you vols-au-vent, or put them in the scrap pile.

    Dock the solid bottom rounds with a fork (prick them lightly, making sure not to go all the way through the pastry) and lightly brush them with egg wash. Place the rings directly on top of the bottom rounds and very lightly press them to adhere. Brush the top rings lightly with egg wash, trying not to drip any down the sides (which may inhibit rise). If you are using the little “caps,” dock and egg wash them as well.

    Refrigerate the assembled vols-au-vent on the lined baking sheet while you pre-heat the oven to 400ºF (200ºC). (You could also cover and refrigerate them for a few hours at this point.)

    Once the oven is heated, remove the sheet from the refrigerator and place a silicon baking mat (preferred because of its weight) or another sheet of parchment over top of the shells. This will help them rise evenly. Bake the shells until they have risen and begin to brown, about 10-15 minutes depending on their size. Reduce the oven temperature to 350ºF (180ºC), and remove the silicon mat or parchment sheet from the top of the vols-au-vent. If the centers have risen up inside the vols-au-vent, you can gently press them down. Continue baking (with no sheet on top) until the layers are golden, about 15-20 minutes more. (If you are baking the center “caps” they will likely be finished well ahead of the shells, so keep an eye on them and remove them from the oven when browned.)

    Remove to a rack to cool. Cool to room temperature for cold fillings or to warm for hot fillings.

    Fill and serve.

Post Title

→

Daring Bakers, Brunch and Some More Pate Feuilletee


Post URL

→

https://mercymadame.blogspot.com/2009/09/daring-bakers-brunch-and-some-more-pate.html


Visit Merci Madame for Daily Updated Wedding Dresses Collection

Goodbye to Autumn with a Green Apple, Caramel and Milk Chocolate Mousse


    Even though I live in an area where the changes in season are very mild and rarely apparent, I love to celebrate it and reflect it in whatever I am doing. We will be entering the winter season in a couple of days and I am having visions of white snow, branches and icicles just like all these flickr favorites that I have been bookmarking lately... I dream of one day spending winter solstice in Iceland.


    My parents left this week leaving me a bit in shambles. It always takes me a few days to get adjusted to not having them around. It is always bittersweet. I made these bavarian mousse cakes for their going away dinner with some caramel cake and layers of green apple, caramel and milk chocolate bavarian. I promise to give you the recipe soon, but with all the holiday prep and organizing for our coming trip, I misplaced the sheet of paper where I wrote it all down. Soon, I promise.

    In the meantime, I hope you are enjoying the last days of autumn before winter arrives. Have a great weekend everybody!


Post Title

→

Goodbye to Autumn with a Green Apple, Caramel and Milk Chocolate Mousse


Post URL

→

https://mercymadame.blogspot.com/2008/12/goodbye-to-autumn-with-green-apple.html


Visit Merci Madame for Daily Updated Wedding Dresses Collection

Seckel Pears and Pate Feuilletee


    Although it might seem I am all about sophisticated food, the truth is that I love rustic cooking. I dream of having a garden one day, growing some vegetables and surrounding myself with fruit trees. I live off soups, stews and fruit most of the time and fruit desserts and custards are my comfort desserts.

    I find that making dough is a very earthy feeling. It is much about how it feels in one's hands. Whether it is soft, sticky and cool ferment or ice cold pie dough, I love touching my ingredients. Hard to describe. Laminated doughs intimidate many people, but in reality, they are easy to make at home. It requires time, a bit of attention and a cold surface always helps. The process is very rewarding and the result, amazing.


    This time, I tried Pierre Herme's pate feuilletee inversee recipe from "Chocolate Desserts". Inversee or inverted means that the butter block is actually on the outside and the flour dough is the lock-in, which is the reverse method of most common puff pastry recipes. This one was very easy as it only has three folds. It makes enough to make four of these tarts and still leaves you with lots of extra to freeze.

    The seckel pears are from our farmer's market, which was a surprise since I have not seen them anywhere this season. These are some sweet pears to eat raw, but this time, I poached them a bit and baked them in the puff pastry tart shell with some hazelnut frangipane. Crispy and buttery.


    Pate Feuilletee Inversee
    adapted from Pierre Herme's "Chocolate Desserts"

    400 grams unsalted butter, room temperature
    175 grams all purpose flour


    With the paddle attachment, cream the butter until smooth. Add the flour and mix until combined.

    Scrape the mixture into a large sheet of plastic wrap and form a square that is about 6 inches (15 cm) wide. Refrigerate for at least two hours.

    185 grams water
    2 tsp salt
    1/4 tsp white vinegar
    420 grams all purpose flour
    115 grams butter, melted and cooled


    Place the flour in the bowl of an electric mixer with the paddle attachment. While the mixer is on, add the melted butter and mix until starts to combine. It will be lumpy. Mix the water, salt, vinegar together and slowly add it to the flour while the mixer is on low speed. Mix until it starts to come together. Depending on the flour, you might not need to add all the water. The dough should be the consistency of soft tart dough.

    Transfer the dough to a sheet of plastic wrap and shape it into a square that is about 2 inches smaller than the butter block. Wrap in plastic and refrigerate for at least two hours.

    Place the chilled butter block on a well floured marble surface (best). Roll it to a rectangle that is about 12"x7". Place the flour block on the middle half and fold the rolled butter block on top. Seal the edges well. make sure the block that is inside reaches out to all corners. Press it gently if you need to. Wrap the dough and refrigerate for another 2 hours.

    To make the first turn, roll the dough on a well floured surface to about 21"x7". The size doesn't really matter that much as long as the dough is three times the length as the width, Give it its first book fold by folding one end of the dough to the middle, the same with the other end. Fold the dough in half at the center. Wrap the dough and refrigerate for 2 more hours.

    Repeat with a second letter fold and refrigerate overnight after this.

    The following day, give it its last turn but this time it will be a letter fold. Roll the dough three times the longer than its width. Fold one end so it covers the middle third of the dough and fold the other end over it. Wrap the dough and refrigerate for at least an hour.

    Roll the dough to about 1/8" thickness. Refrigerate the dough for another 30 minutes before cutting. You can also freeze the rolled puff pastry at this point. Just cut it into rectangles that will fit into your sheetpan and place parchment paper in between the sheets so they do not stick in the freezer. It will last up to a month in the freezer.

    Hazelnut and Almond Frangipane

    100 grams butter, room temperature
    100 grams sugar
    1 egg
    10 grams flour
    50 grams almond flour
    50 grams hazelnut flour
    Dark rum, to taste (splash)


    Cream together the butter and the sugar. Add the egg and mix until combined. Add the flour, almond and hazelnut flours and mix until it comes together. Add the dark rum to taste (about 1 Tbs).

    Poached Seckel Pears

    200 grams sugar
    400 grams water
    1/2 vanilla bean
    10 seckel pears


    Make a sugar syrup with water, sugar and vanilla. Peel the pears leaving the stem on. Poach the pears in the sugar syrup in medium to low heat for about 15 minutes or until soft. Remove pears from syrup and let them cool. Store pears in cooled syrup in refrigerator.

Post Title

→

Seckel Pears and Pate Feuilletee


Post URL

→

https://mercymadame.blogspot.com/2008/12/seckel-pears-and-pate-feuilletee.html


Visit Merci Madame for Daily Updated Wedding Dresses Collection

Pear and Raspberry Flan Tart


    Have I mentioned how I love autumn? The cool weather we have had the last few days has only magnified this sentiment. Mornings with bright blue skies and scarves make me happy. Very happy indeed. My parents are here, the weather is beautiful and I am lucky to be able to dedicate my time to the things I love the most. I feel very blessed.


    For this tart, I used some leftover gingerbread sugar dough I had. The tart shell is blind baked, then filled with a vanilla bean and kirsch custard, fresh raspberries and topped with pear slices that I previously poached in a vanilla bean syrup. This tart is best served slightly warm.. it melts.


    Originally, I intended to make this flan tart using some quince I found at the supermarket a few days ago. I wanted to slowly poach them in a vanilla syrup and use them as the topping as I had seen in Christine Ferber's "Mes Tartes" book. However, as often times happens with not very popular produce bought at mainstream supermarkets, the quince were rotten inside. Brown and dry. I really get upset when this happens and not only because I wasted money on rotten food, but mainly, because it brings light to the fact that in this country, it is very difficult to find good quality produce. Why is that? I know there are great farms in this country, yet the produce available to us is very poor. Should I just surrender to the fact that I live in Florida and that the quince I so desire must travel great lengths to get to me? I think I'm just spoiled.


    Poached Pears

    500 grams water
    250 grams demerara sugar
    1 vanilla bean, split
    2 Anjou pears (ripe but still firm)


    Place the water, sugar and vanilla bean in a medium saucepan. Bring to a boil and when sugar is dissolved, lower heat.

    Peel and cut the pears in half. Remove the core with a melon baller. Place the pears in the syrup and simmer for approximately 20 minutes or until tender. Store in an airtight container in the refrigerator.

    Vanilla and Kirsch Custard

    100 grams heavy cream
    100 grams whole milk
    6 egg yolks
    50 grams sugar
    30 grams kirsch
    1 vanilla bean, seeded


    Whisk together the egg yolks and sugar. Add the cream, whole milk, kirsch and vanilla bean seeds and whisk.

    Assemble Tart

    Roll gingerbread sugar dough to about 1/8" thick. Fill tart pan with dough and refrigerate for at least 2 hours. Dock the bottom of the dough with a fork and blind bake at 350F for about 15-20 minutes. If the dough has been refrigerated long enough and if it's not overmixed, it will not shrink in the oven so I generally do not use pie weights. Let the baked tart shell cool.

    Fill the tarts with fresh raspberries. Pour the custard in the tart shell to the top. Place thinly sliced poached pears on top and sprinkle with sugar. Bake in a 325F oven for about 25-30 minutes until the sides start to turn golden brown.

    Happy Halloween everyone!

Post Title

→

Pear and Raspberry Flan Tart


Post URL

→

https://mercymadame.blogspot.com/2008/10/pear-and-raspberry-flan-tart.html


Visit Merci Madame for Daily Updated Wedding Dresses Collection

A Gluten Free Daring Bakers... and a "Laster Arte"


    Tomorrow my little boy and I will be hopping on a transatlantic plane on our way to Bilbao. We will be gone for two weeks, visiting family and friends.. eating, walking, conversing, playing and enjoying life. But before we leave, here is this month's Daring Bakers challenge. Challenge, it was. I decided to go ahead with the gluten free recipe and it took three attempts to get it right, but the end result was fantastic.

    Although we had the option of taking a savory route, I decided to stick to my sweet side and sprinkled my crackers with cinnamon sugar. I also made a pear, fig and vanilla bean jelly to go with it and a baked pear custard to dip the crackers into.


    For the recipes, please visit my friend Jill's blog where I post all my gluten free recipes. And a big thank you to Sheltie Girl of Gluten A Go Go and Shel of Musings from the Fishbowl for hosting this month's challenge and to see what other Daring Bakers' interpretations, please go here.

    Laster arte and in the meantime, cook and eat well! See you soon!

Post Title

→

A Gluten Free Daring Bakers... and a "Laster Arte"


Post URL

→

https://mercymadame.blogspot.com/2008/09/gluten-free-daring-bakers-and-arte.html


Visit Merci Madame for Daily Updated Wedding Dresses Collection

Popular Posts

My Blog List